Clearroom 1.0 · macOS
Clearroom Manual
How to use it — the screen first, then the things you’ll actually do. Words in a box are the app’s own; the numbered labels are ours.
Also as a PDFThe complete reference
01 · Install it
- Quit your DAW first — the installer replaces the plugin while it is closed.
- Open Clearroom-1.0.0.dmg and double-click the installer inside. There is nothing to drag to Applications and nothing to choose: it installs the app, the Clearroom Audio device, and the AU and VST3 plugins, and asks for your administrator password. If Clearroom is running it closes and reopens at the end; your audio pauses for a second while macOS restarts its audio engine.
- If the last pane asks you to restart the Mac, do it once — that finishes installing the audio device.
- Open Clearroom. It lives in the menu bar as well as in a window. Enter the key from your purchase email and click Activate, or click Start 14-day free trial and give an email address. No card.
- The first time you measure a room, macOS asks to use the microphone — allow it.
The plugin appears in your DAW’s AU / VST3 list after its next rescan. Updating later is the same installer, newer — see 09.
02 · The main screen
This is the screen you’ll spend your time on. The five in gold do most of the work; the rest is numbered in blue and explained below.
- Profile switch
Click the profile name at the top of the window. The list opens with My Rooms and My Headphones; click a row to load it — a ✓ marks the one you’re on. Every profile remembers its own output (9), so switching profiles switches the output with it. The bin icon on a row deletes that profile; the one you’re listening to can’t be deleted — switch first.
- Intensity
Pick the level that sounds right in your room, and nothing else — start at 5. Switching is seamless and loudness-matched: the tone changes, the loudness never does. How to choose: put on two or three things you know cold and walk up and down the ten levels while they play. Stop where the low end firms up without the room sounding squeezed. Subtle keeps your room; Full locks onto the target.
- Volume knob
Your listening level. Drag it down, or scroll on it; the readout follows. 0 dB is the loudness-matched level and it only goes down — the correction is already matched, so there is nothing to add. Set your interface once, then ride this.
- Bypass trim
Correction OFF should sound as loud as ON. If it doesn’t in your room, click the little fader glyph to the right of the Correction switch and move the slider in the Bypass Trim popover until the two match — it moves the bypass signal only, your corrected sound never moves, and Reset takes it back to 0. It is remembered per profile, so trim each room once; after that the glyph shows the value. Never even an A/B with the volume knob.
- Off / Live pill
The switch that puts everything your Mac plays through your room. Off means Clearroom is doing nothing to your audio; click it and it reads Live. Bypassed means it is running with correction off; grey Paused means this Mac isn’t licensed right now. This is the first thing to click once you have a profile.
- Correction ON / OFF
Your A/B, once you are already listening — it does not start listening; the pill (14) does that. OFF is your raw room at the same loudness, so it’s a fair comparison, not a volume jump.
- The graph
Grey is your room before. Blue is what you hear now. The dashed line is the target this profile aims at — it stops around 10 kHz on purpose, and below the marked cut-off the blue curve falls away on purpose too: Clearroom doesn’t push your speakers below what they can play, and eases off up top.
- Meters
Input and output, left and right. They only move once the pill says Live.
- Mono · Dim
Mono folds the mix to one channel so you can check the centre. Dim drops your level by a fixed amount without touching the volume knob. The amount is set in Settings → Dim amount — right-clicking Dim does nothing in the app; that is the plugin’s gesture (see 06) — and the DAW plugin follows it.
- OUTPUT device
The interface or output this profile plays through. Change it here; the profile remembers it.
- Target
The curve this profile was made to. The pencil re-targets the same measurement to a different curve — a new profile beside the old one, nothing overwritten (see 07).
- Plugin dot
A quiet dot beside the pill: filled when the DAW plugin is on the same profile as the app, a faint dash when no plugin is open. It only uses words when it needs you — Plugin mismatch means the plugin is on a different profile; pick the same profile in either place and it clears. Hover it to see which profile each open plugin is on.
- + New Profile
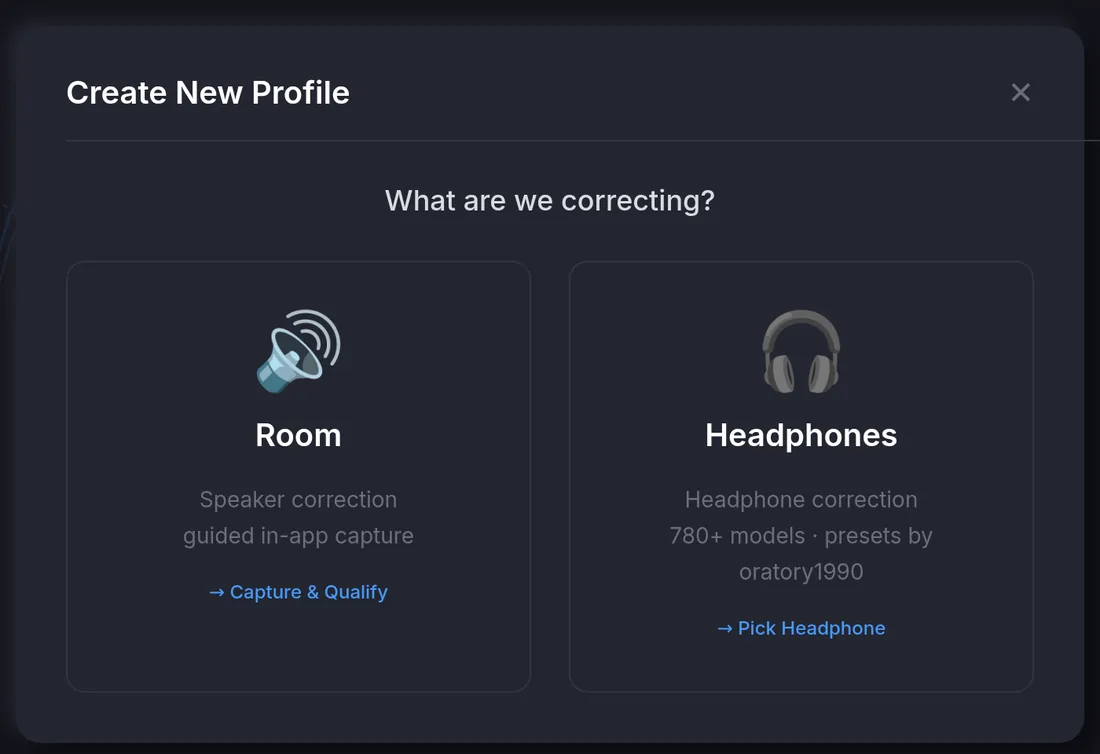
Measure a room or pick headphones — the walkthroughs are next.
- Settings
Where you’ll find the driver switches, start-at-login, your licence, the dim amount and the headphone database.
On a fresh install this screen is nearly empty — no curve, no profile, and the menu bar reads Turn Correction On — no profile yet. That’s normal. Click + New Profile (12) and come back here when it’s made.
03 · Your room, in about fifteen minutes
You need an audio interface, a measurement mic on a stand, its calibration file, and a quiet quarter-hour for the measurement itself; building the profile afterwards takes a few minutes more. A measurement mic is a small omni made to be flat, not a vocal or instrument mic — an SM57 or a large-diaphragm condenser will not do. The app knows five by name: miniDSP UMIK-1 and UMIK-2, Sonarworks XREF20 / SoundID Reference, Dayton EMM-6 and Behringer ECM8000; any other calibrated mic works too. Click + New Profile → Room. The app counts eight setup screens; these are the six things you actually do.
- 1
Place your mic
app step 1 of 8On a stand, at ear height, exactly where your head sits when you mix. Point it straight up — never at the speakers — and leave it pointing up for the whole measurement. Height and aim are yours to get right; the app checks everything else.
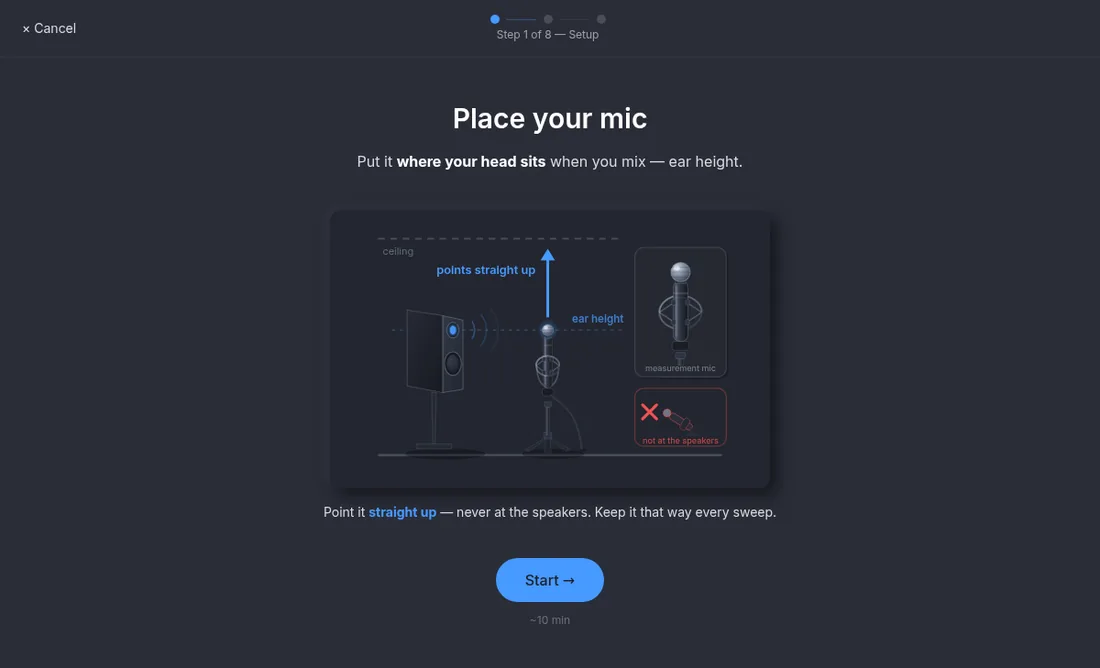
The first screen shows you the placement: ear height, pointing up, never at the speakers. - 2
Pick your interface
app step 2 of 8Pick your interface for the output. For the input, pick the interface the mic is plugged into — or the mic itself if it’s USB (UMIK-1, UMIK-2). Best when both are the same interface. The app marks what it can’t measure through — built-in audio, AirPods and Bluetooth are under Not recommended. Then say which channel the mic is on and which outputs feed left and right.
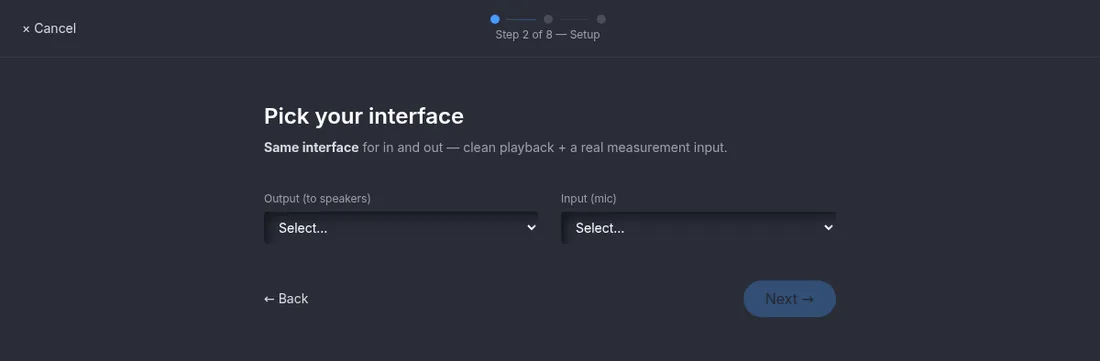
Output (to speakers) and Input (mic), then the channel routing once both are chosen. - 3
Mic + calibration
app step 3 of 8Pick your mic from the list. Get my file → opens Clearroom’s guide at the section for your mic, with that vendor’s steps for downloading its calibration file — take the 90° (pointing-up) one if they offer angles. Import file… loads it. No file? You can carry on — the highs are a little less accurate and the score says so.
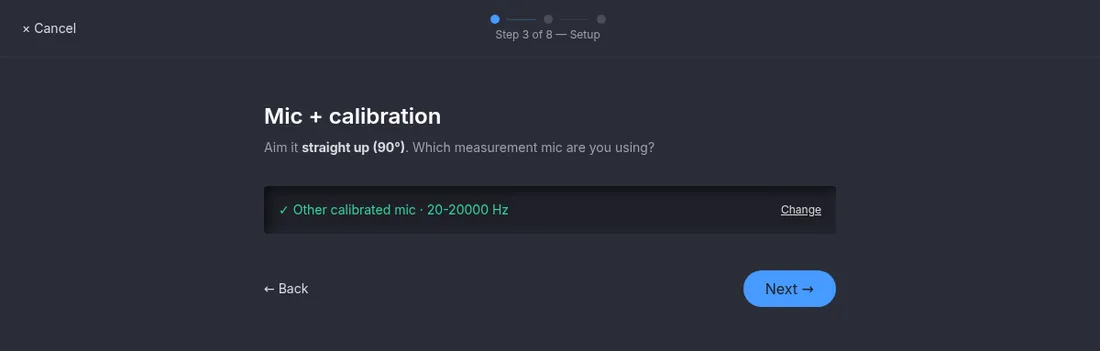
Once you’ve picked the mic and loaded its file, the row collapses to a confirmation like this one. - 4
Four quick checks
app steps 4 – 7 of 8Tap the mic — the meter should jump. Play the channel test: left should come from the left speaker, and if it doesn’t, swap your cables. Set your monitor volume by ear, a little louder than conversation. Then raise the mic gain until the bar holds in the green (−24 to −18 dBFS) for three seconds. After this, don’t touch the monitor volume or the preamp again.
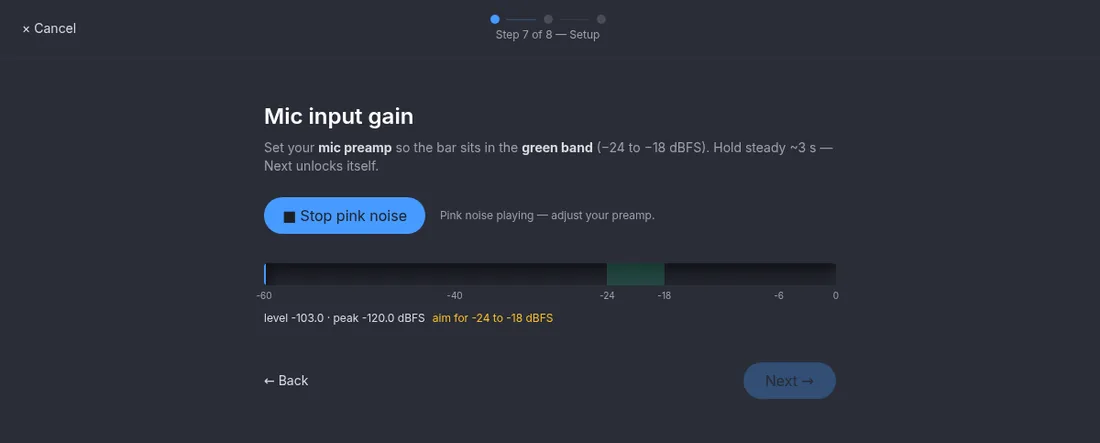
The mic-gain screen: the bar has to sit in the green band and hold there. - 5
Centre the mic
app step 8 of 8The app pings left and right and shows the offset live — Move mic left by 3.1 cm, streak 2/3. Slide the mic the way it tells you, in small moves, until it reads ✓ in position for three pings in a row. That places it within 2 cm of the exact middle between your speakers. Stuck after half a minute? Click Can’t hit the target? — usually one speaker is farther away than the other, or headphones are plugged in and stealing the output.
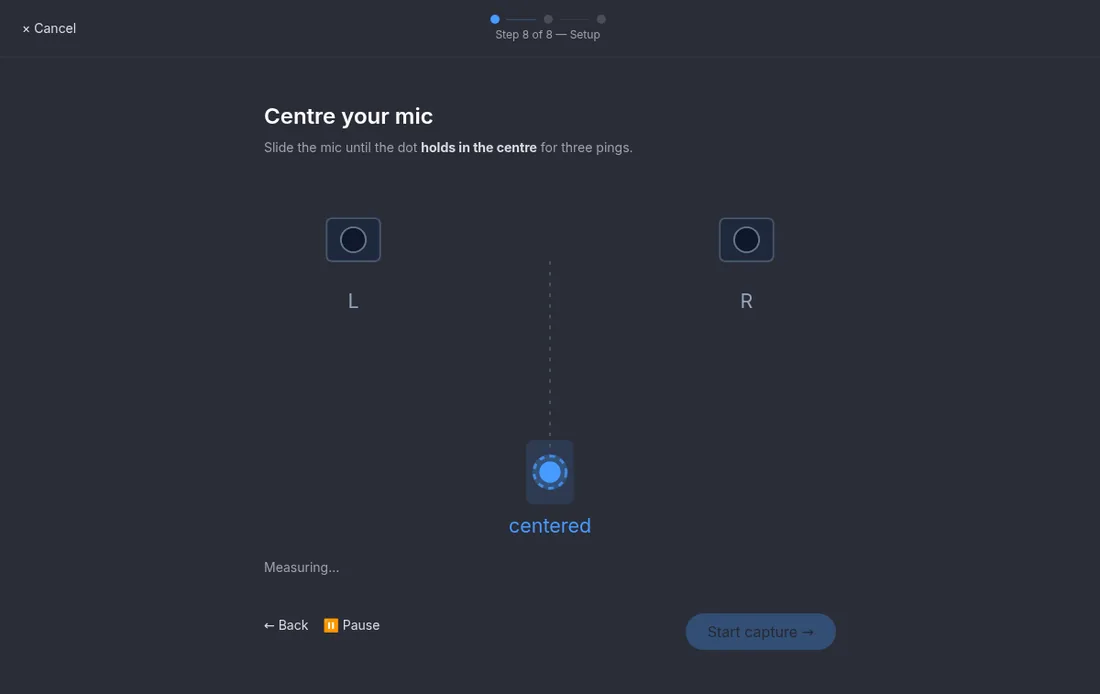
Slide the mic; the readout counts on-target pings — three in a row unlocks the capture. - 6
Three positions
the three capturesThe capture starts by itself once you’re centred and steady. The app listens to the room for a moment, then counts down ten seconds behind a large Do not move — sit still and quiet — then plays a short tone and a sweep from each speaker. About a minute. When it says ✓ P1 captured, click Next → P2 and move the mic 10 cm to the left of centre (the mic moves, not your chair; both offsets are measured from the centre you just found). Re-centre on the target, and again the capture starts the moment you’re in position and steady — so be quiet before you get there. Then the same 10 cm to the right. Three spots around where your head sits, so the correction holds across the whole chair.
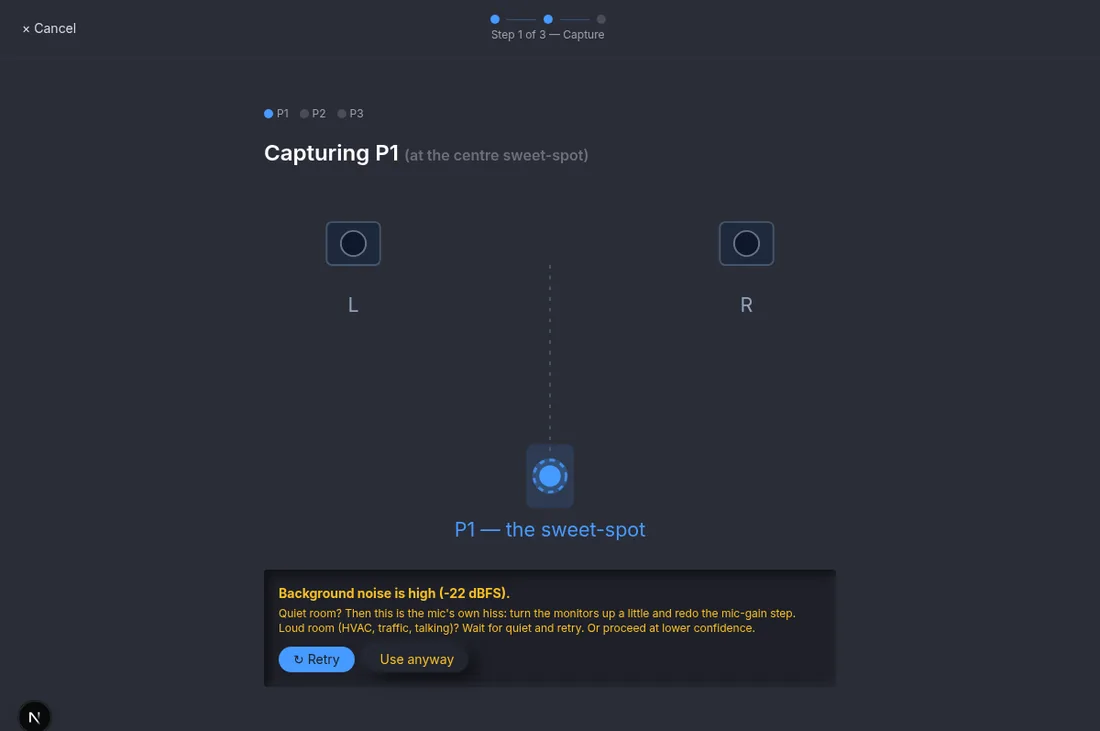
If the room isn’t quiet enough you’ll see this before the sweep starts: retry, or go on at lower confidence.
Then: the score, a target, and the correction
After the third position the app scores the measurement and shows one of four words. Full — a clean measurement. Tone — good enough to fix the tone, which is what most good rooms score and what 1.0 corrects. Limited — usable, but something was noisy or inconsistent; worth a retake if you have ten minutes. Redo needed — Continue → is greyed out: retake one position (the other two are kept) or start over. Then click Continue →.
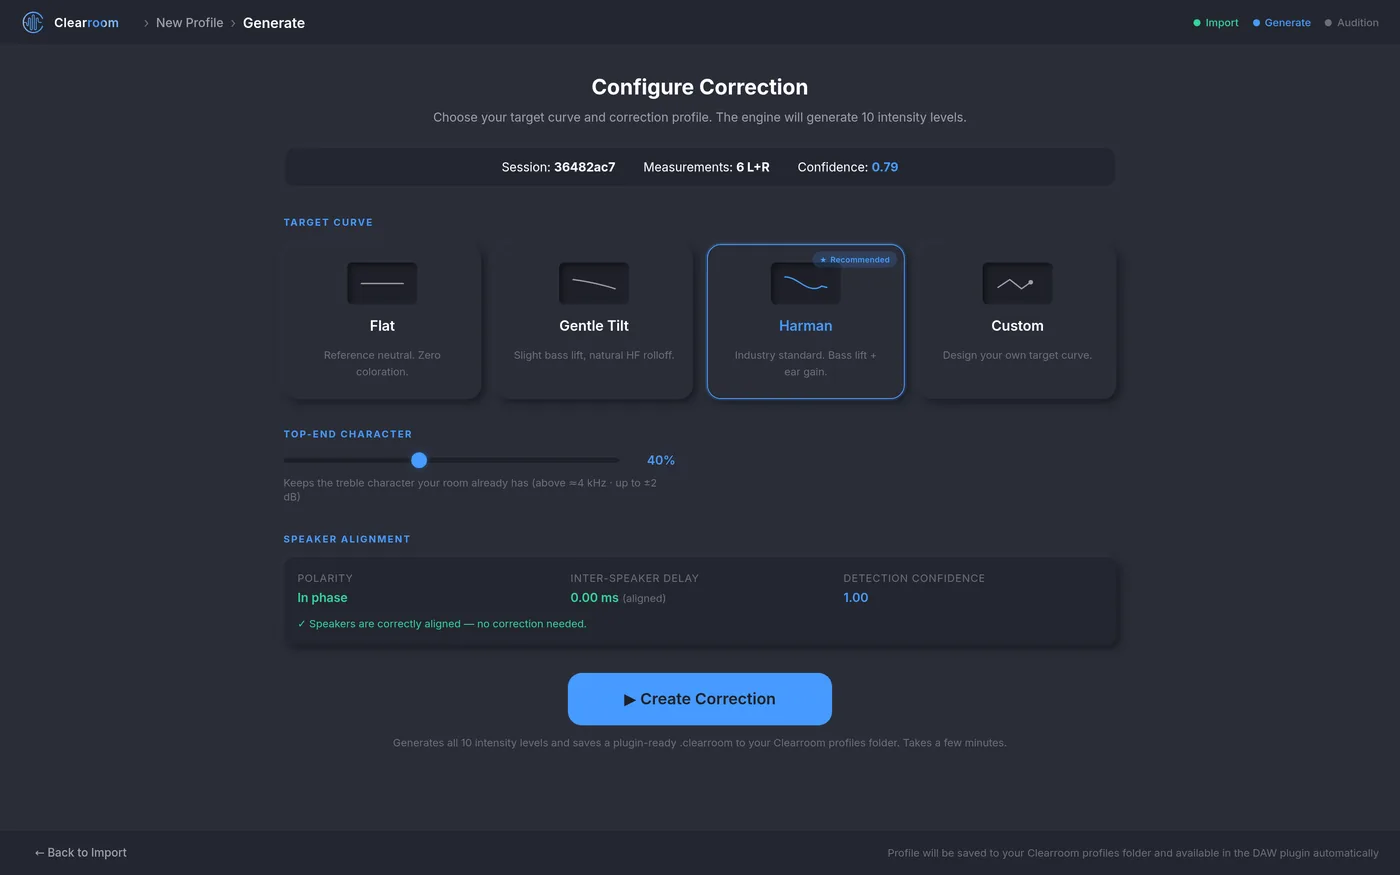
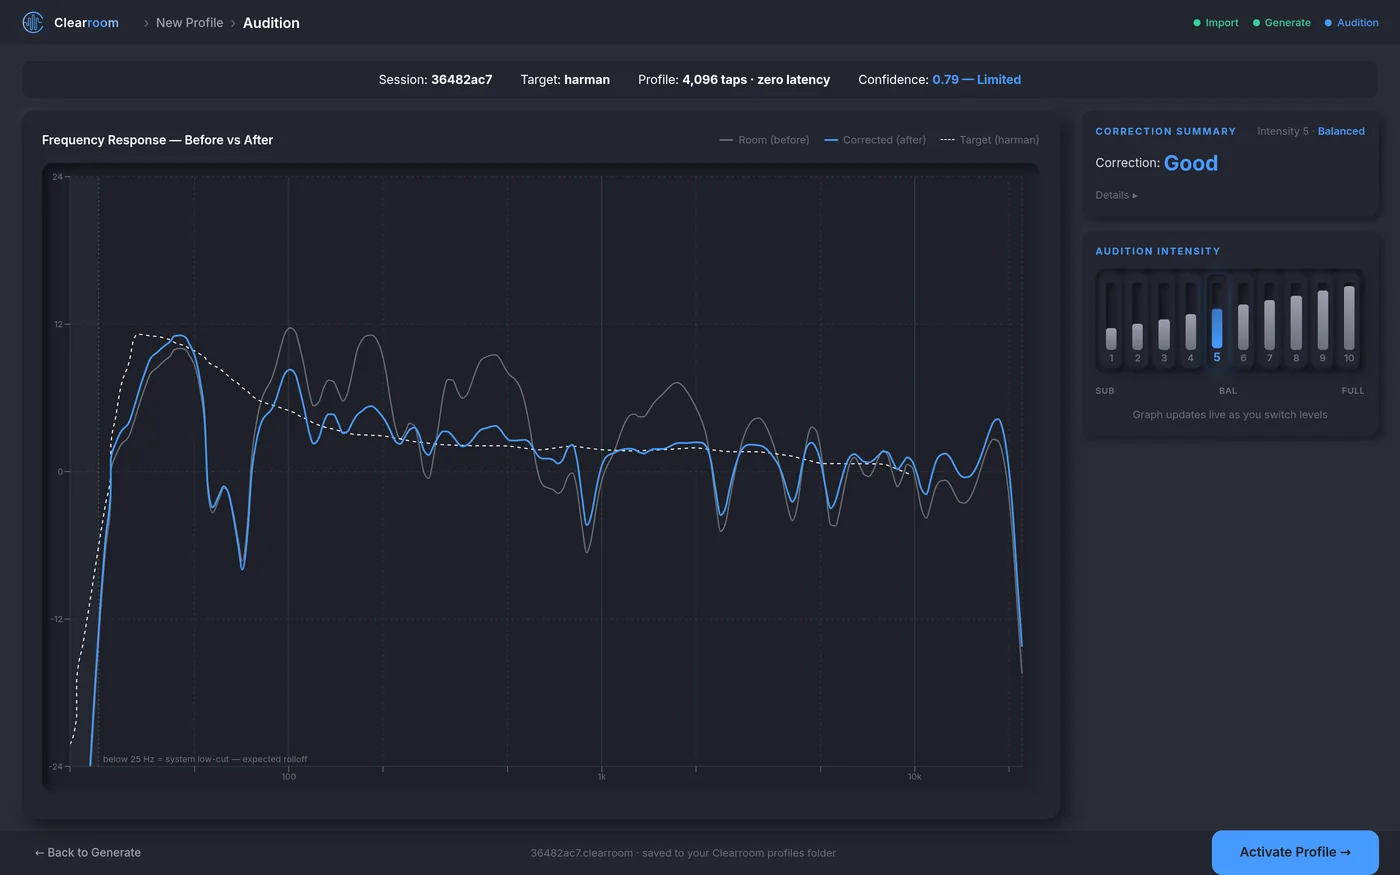
That’s it. The profile lands on the main screen and in the plugin’s list by itself — there is nothing to install. Click the pill to Live and listen.
04 · Headphones, in a minute
No measurement. Click + New Profile → Headphones, search by brand or model, click Select. If a model comes in versions the app asks Which one do you have? — it’s usually printed on the earcup.
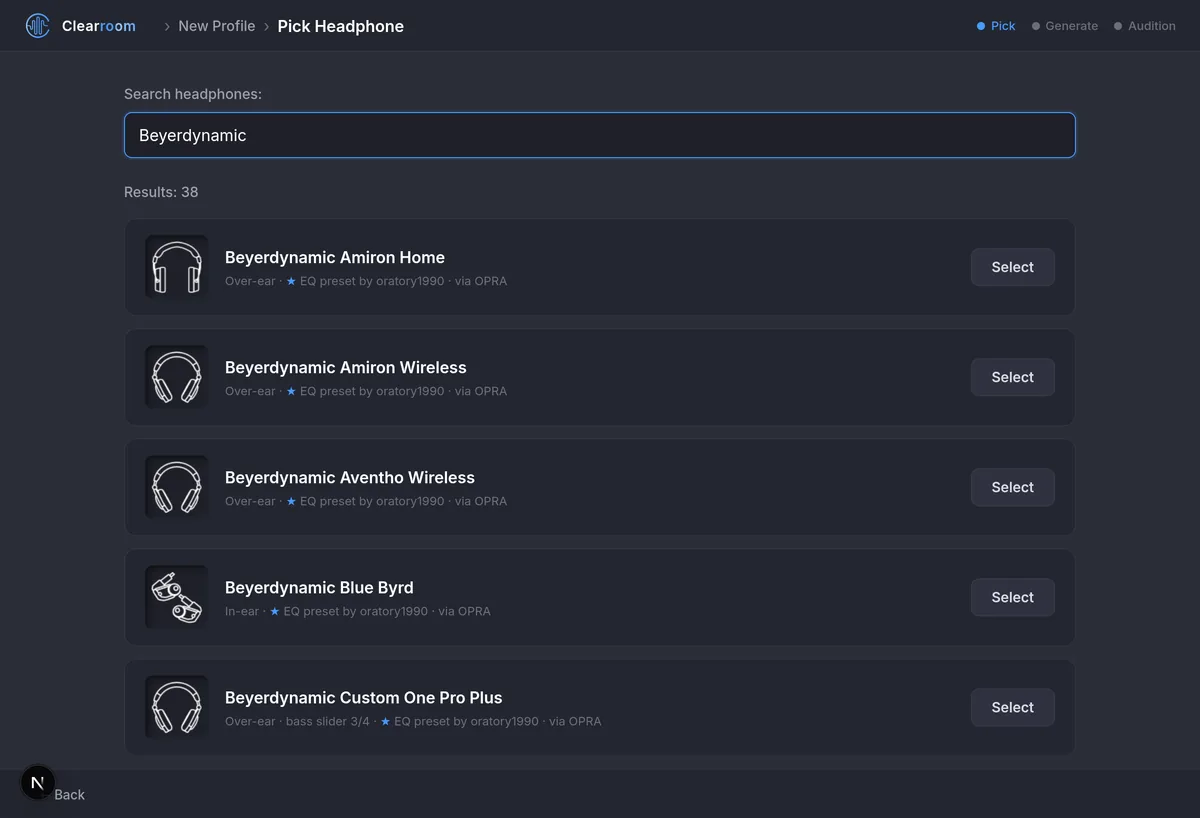
Then pick a target. Start on Studio. Flat removes even the lift your own ear adds, so it sounds thin on purpose. Click Create Correction — the app says a few seconds, and it means it. Plug the headphones in, check the OUTPUT row (9) points at the socket you’re using — the profile remembers it — and click the pill to Live.
Where the ★ rows come from: oratory1990’s published EQ for that model, from which Clearroom works out the headphone’s response and builds its own correction. It describes that model with those pads and settings, not your particular pair — trust your ears over the star. If yours isn’t listed, Import your own measurement takes a two-column CSV, and Request a headphone opens an email to us.
05 · Listening
Two ways to hear a profile: everywhere on the Mac, or inside your DAW. The DAW is the next section — this one is everything else.
Everything the Mac plays
This is systemwide correction: click the Off / Live pill at the top right of the window (Off → Live), or Turn Correction On in the menu bar. Clearroom sends the Mac’s output to Clearroom Audio, remembers the real device you were on, and passes everything through the correction — Spotify, references, a bounce in the Finder, all through your room. Click the pill again and your real output comes back. The pill also says Engaging… while it switches, amber Bypassed when it’s running with correction off, and grey Paused when the licence needs attention.

Clearroom can start correcting the moment it opens and release the audio when it quits — both are switches in Settings — and Start Clearroom at login keeps the room corrected after a restart.
From the menu bar
Most days you never open the window. The Clearroom icon in the menu bar carries the whole surface: the status line (Correction on, and under it the profile, the output and the intensity actually running), Turn Correction On / Off, a PROFILE list, an OUTPUT list, Mono, Dim −20 dB, and Open Clearroom… / Quit Clearroom. Switching from monitors to headphones is two clicks there — pick the headphone profile under PROFILE and it brings its own output and its own intensity with it — every profile comes back at the level you last used it at. Quit tells you what happens to your audio: audio reverts, or audio stays on Clearroom Audio if you’ve switched the hand-back off.

The icon’s colour is the state. Green — correction is on. Amber — off, or on but bypassed; either way you’re hearing your raw room. Grey — engaging or reverting, a moment while the audio moves over. Red — attention: correction can’t run as things are — the output it was on has gone, the driver isn’t answering, or the licence needs you. Open Clearroom. The menu also carries an intensity list, 1 to 10, live while correction is on: the level you pick there is the one running, and the profile remembers it.
While the Generate screen or the Target Editor is open with correction on, sound is muted on purpose and the menu bar says Muted while re-targeting — finish or cancel in Clearroom. Do that, and it returns.
06 · In your DAW
The same profile and the same controls, in the session.
- You quit your DAW before running the installer; the plugin shows up in its AU / VST3 list at the next rescan.
- Insert Clearroom last on your monitor path — the master or monitor bus, after everything else.
- Open the profile menu (it opens on No profile) and pick your room. A profile you made while the DAW was open appears the next time you open the menu, or click Refresh.
- Set the intensity you settled on in the app. The Clearroom app doesn’t have to be running — but this Mac has to be licensed, or the plugin outputs silence and its footer says Open the Clearroom app.
- Profile menu
MY ROOMS and MY HEADPHONES; Refresh at the bottom rescans the folder.
- Intensity
The same ten levels as the app, with SUBTLE, BALANCED and FULL marked on the fader. Switching is seamless and loudness-matched.
- OUTPUT
Your level, downwards only. 0 dB is the loudness-matched level, so there’s nothing to add above it.
- Bypass Trim
If OFF feels louder or quieter than ON, nudge this until the two match. It goes down to −6 dB; how far up depends on the profile — some offer no upward travel, because the corrected path has no headroom left to give. The setting belongs to that profile, and a saved session brings it back.
- Correction ON / OFF · Mono · Dim
The same A/B, mono fold and dim as the app. The dim amount you set in the app’s Settings carries into the plugin by itself — change it there and the plugin follows within a second. Right-click Dim in the plugin to set it there instead — a plugin-only gesture; the app’s Dim has no right-click.
- App status
App means the Clearroom app is on the same profile. App · mismatch means it’s on a different one — pick the same profile in either place. App off means the app isn’t running.
- Target line
The curve this profile was made to, with the top-end setting, and whether it’s a ROOM or HEADPHONE profile.
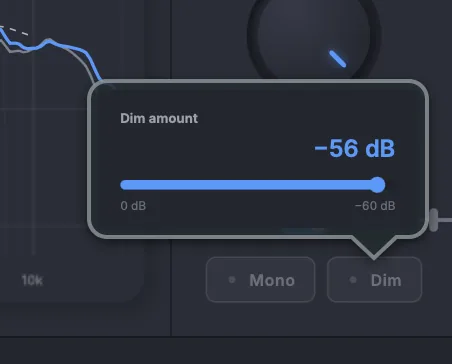
Bounces, freezes and renders come out uncorrected — the plugin fixes what you hear, never what you print, so a render with it loaded is identical to one without. And keep plugin delay compensation on: the plugin adds no latency at 48 kHz and reports a few samples at other rates for the host to absorb (the numbers are in 11).
07 · Targets, re-targeting and Signature Profiles
A target is the curve the correction aims at. Harman for rooms and Studio for headphones are where to start; Custom opens the Target Editor if you want your own.
Change the target of a room you’ve already measured
On the main screen, click the target chip at the bottom (the one with the ✎). The Generate screen reopens as Re-target This Room with the same measurements — pick a different curve, click Create Correction, give it a new name. A couple of minutes later there is a second profile beside the first; nothing is overwritten, and you can A/B them from the profile menu. Headphone profiles re-target the same way, in seconds. If the chip is dimmed and says Source measurements not available, the original session was deleted — measure again.
Signature Profiles
A Signature Profile is a target curve, not a profile of your own — one made with a named engineer and signed by them: the curves at clearroom.studio/targets. Download the file, click Custom on the Generate screen, then Import in the Target Editor. The ★ and the engineer’s name stay attached, and you can never save over their file — your edits become your own copy.
Housekeeping
To delete a profile, open the profile menu and click the bin icon on its row; the confirmation says the file is removed from disk and the plugin stops seeing it, and it cannot be undone. The profile you’re listening to can’t be deleted — switch to another one first.
08 · Your licence
One licence, two Macs at a time. A trial is one Mac, 14 days, the full app.
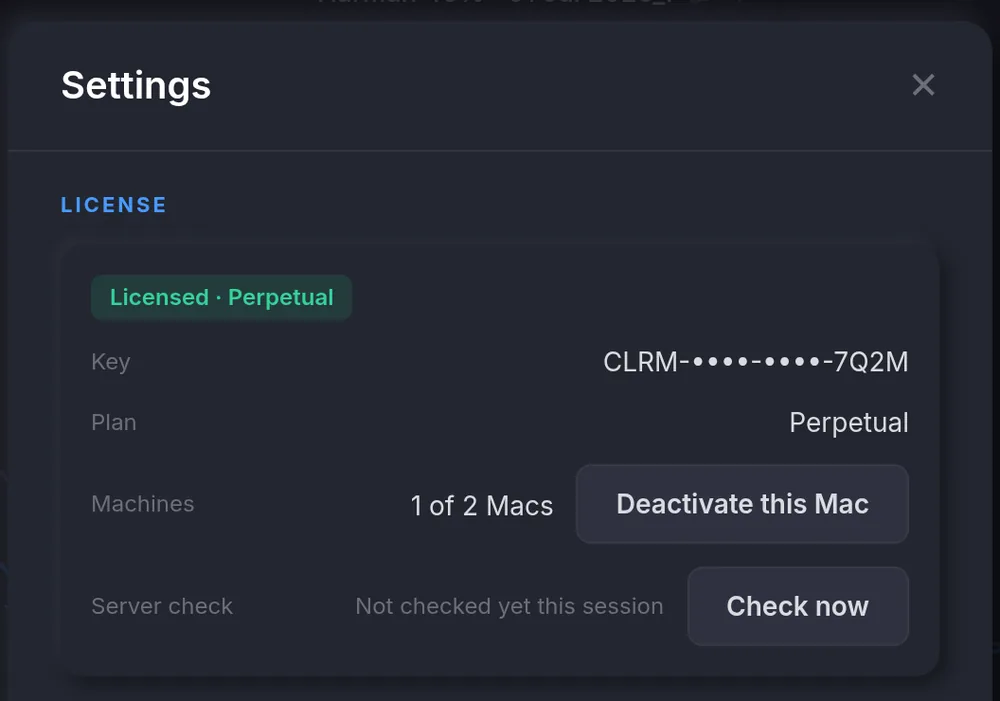
- First launch
- Enter the key from your purchase email and click Activate — or click Start 14-day free trial and give an email address. No card.
- Your second Mac
- Install from the same DMG and enter the same key. Two Macs may be active at once; a third is a support conversation, or a second licence with its own key.
- Moving to another Mac
- On the Mac you’re leaving: Settings → License → Deactivate this Mac. The seat frees instantly. Do this before the Mac is sold or wiped: deactivating needs an internet connection.
- A Mac you can’t reach
- At clearroom.studio/account, Report this Mac lost. The seat frees 30 days later. You get two lost reports a year.
- When the trial ends
- Correction pauses on day 14. Nothing you made is deleted. Buy, then enter the purchased key in Settings → License on the same Mac — there is no upgrade flow and nothing to deactivate first.
- Lost your key
- Sign in at the account page with your purchase email and click Email me the key.
- A Mac that stays offline
- Clearroom checks in about once a day. A bought licence keeps correcting for 60 days with no connection at all (a rent-to-own one for about 37 until it’s paid off); after that correction pauses until it reconnects. It’s quiet about it for the first week, so a studio that lives offline should use Activate offline: it shows you a code; on any device with internet, open clearroom.studio/activate, enter your licence key and that code, and download the licence file; paste it back into Clearroom. Do it again every 30 days.
- If a licence lapses
- Only correction pauses. Measuring, profiles and files keep working.
09 · Updating
Clearroom doesn’t check for updates and never updates itself. Download the newer DMG from clearroom.studio, quit your DAW, and run its installer over the old one; your profiles, targets and licence stay where they are. Running the same build (or an older one) does nothing at all. Settings → About shows the version and build you’re on.
The headphone database is separate: Settings → Update headphone database, a button you click — it adds headphones and corrections published since your build.
10 · When something’s off
- The installer fails with a vague error from macOS.
- Your Mac’s output is still set to Clearroom Audio, usually after a crash. Open Clearroom, or pick your real output in System Settings → Sound, then run the installer again.
- Clearroom Audio is missing from System Settings → Sound → Output.
- Restart the Mac once — that finishes installing the driver.
- The calibration file won’t load.
- It’s probably a PDF or a screenshot, not the file. The app wants plain text: one frequency and one dB value per line.
- I don’t hear your mic.
- Check the mic is in a mic input, not a line input. Turn phantom power on if it needs it. Make sure you picked the right channel and turned the gain up. Then check macOS: System Settings → Privacy & Security → Microphone, and allow Clearroom.
- It says background noise is within a few dB of the test signal.
- Quiet room? Then it’s the mic’s own hiss — turn the monitors up a little and redo the mic-gain step. Noisy room (aircon, fridge, traffic)? Wait for quiet and click Retry. Use anyway does capture, but the position is flagged and your confidence score carries it. Raising the mic gain never helps — the reading is a ratio.
- A position fails with input clipped.
- Lower the interface’s input gain and retake that position.
- Something banged during a sweep.
- Don’t wait it out. Click Retake to cut the tone; the app takes you back through that position’s centring — a bang usually means something moved — and the capture starts again once the mic is back on its spot and steady. Stop goes back. Nothing partial is saved.
- The plugin says No profile or No profiles.
- No profile means one just isn’t loaded — open the profile menu and pick your room. No profiles means the folder is empty: make one in the app, then open the menu again (it rescans every time you open it) or click Refresh.
- My bounce has no correction in it.
- That’s deliberate. The plugin corrects what you hear, never what you print — a render with it loaded is identical to one without.
- The plugin is silent and says Open the Clearroom app.
- This Mac isn’t licensed right now. Enter or renew your key in Settings → License and the plugin comes back within a second. Measuring, profiles and files keep working meanwhile.
- My Mac went silent after I quit Clearroom.
- The Settings switch that hands your audio back when Clearroom quits is off, so the output stayed on Clearroom Audio. Open Clearroom again, or pick your real output in System Settings → Sound.
- No sound on the Generate screen.
- On purpose, when the pill is Live: monitoring is muted while you choose a target. It comes back on the Audition screen.
- The trial button says this Mac already used its trial.
- One trial per Mac. If you started it, your key is in the trial email, or get it from your account.
11 · The fine print
The reference, for the curious. The complete version lives at clearroom.studio/manual/reference.
The ten levels
One run makes ten complete filters. The only thing that changes between them is how far the correction is allowed to cut and boost.
| Level | Name | Max cut | Max boost |
|---|---|---|---|
| 1 | Subtle | 2.0 dB | 1.0 dB |
| 2 | Gentle | 3.0 dB | 1.5 dB |
| 3 | Light | 4.0 dB | 2.0 dB |
| 4 | Moderate | 5.5 dB | 3.0 dB |
| 5 | Balanced | 8.0 dB | 4.0 dB |
| 6 | Firm | 10.0 dB | 4.5 dB |
| 7 | Strong | 12.0 dB | 5.0 dB |
| 8 | Tight | 15.0 dB | 5.5 dB |
| 9 | Precise | 18.0 dB | 5.8 dB |
| 10 | Full | 20.0 dB | 6.0 dB |
Max boost is the broadband ceiling. In the bass the engine holds boost to 4.5 dB at and below 200 Hz at every level, and adds nothing at all below half your speakers’ low limit — no intensity setting fills in a roll-off your speakers don’t reach.
Facts
- Runs on
- macOS 12.3+ on Apple Silicon · 10.15+ on Intel
- Plugin
- AU / VST3 · AAX (Pro Tools) is not in 1.0
- Latency
- 0 samples at 48 kHz (the profile’s rate); 32 at 44.1 kHz, 64 at 96 kHz, 128 at 192 kHz — reported to the host, so leave delay compensation on
- Profiles live in
- ~/Library/Application Support/Clearroom/profiles/ — leave them there; the plugin scans that folder
- Install
- One installer: app, Clearroom Audio, AU + VST3. Quit your DAW first.
- Uninstall
sudo "/Library/Application Support/Clearroom/uninstall.sh"Keeps your profiles unless you add --purge. Dragging the app to the Trash is not enough — the audio device, the plugins and the login item stay behind; the command works even after the app is gone.- Help
- support@clearroom.studio — write from the email address you bought with